Step
- Step 1 : CRM Free Trial Account
- Step 2 : Activate Account
- Step 3 : Login to your account.
- Step 4 : Dashboard
- Step 5 : Manage Customer
- Step 6 : Manage Equipment
- Step 7 : Manage Call
- Step 8 : Manage Field Service Report
- Step 9 : Manage Dealer
- Step 10 : Manage Employee
- Step 11 : Manage Attendance and Leave
- Step 12 : General Setting
- Step 13 : Manage Subscription
Step 1 : CRM Free Trial Account
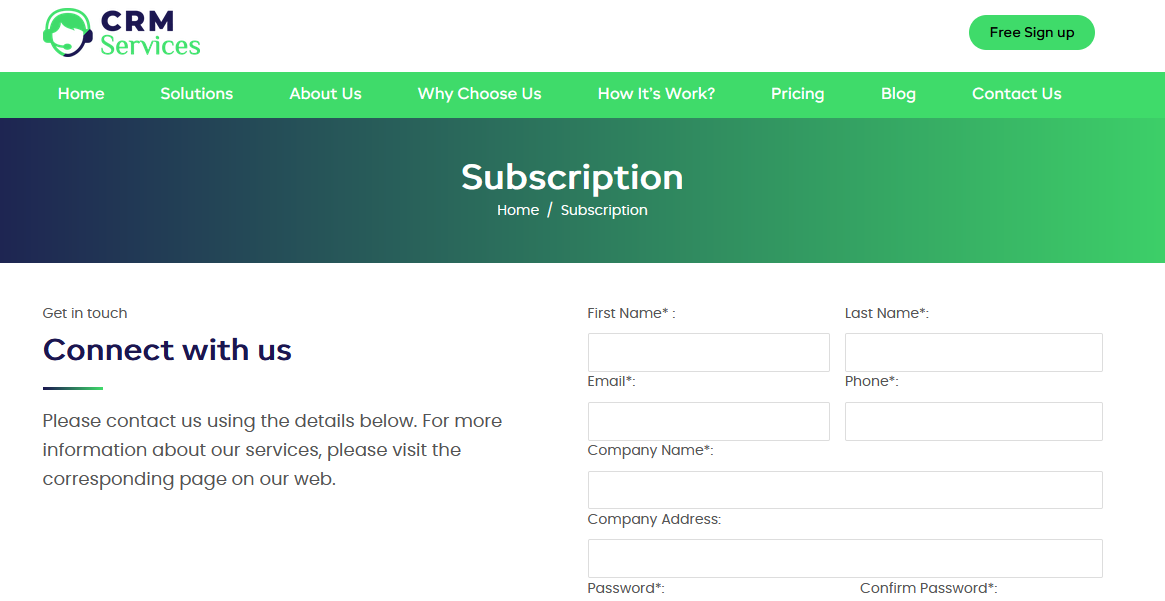
- Create Account from this URL https://www.crmcallservices.com/subscription/ or click to free sign up button.
- First Screen: In this screen you have to enter basic information and submit. An email will go the user with activated link.
- Second Screen: Select the package as you want. You have to apply this package after free trial expire.
- Thank you screen: Thank you screen appear after select the package and an email will go to the user with selected package information .
Step 2 : Activate Account
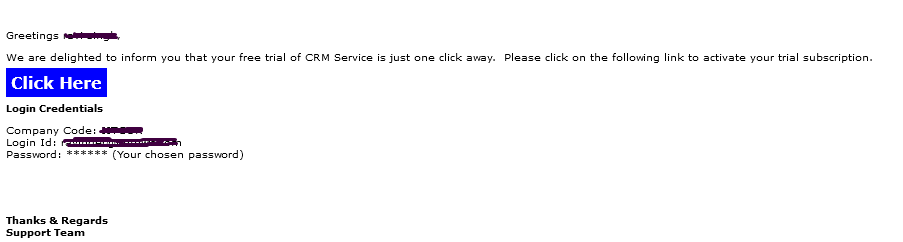
- Open your email
- Click to activated link
- After click on activated link. Your account is activated.
Step 3 : Login to your account.
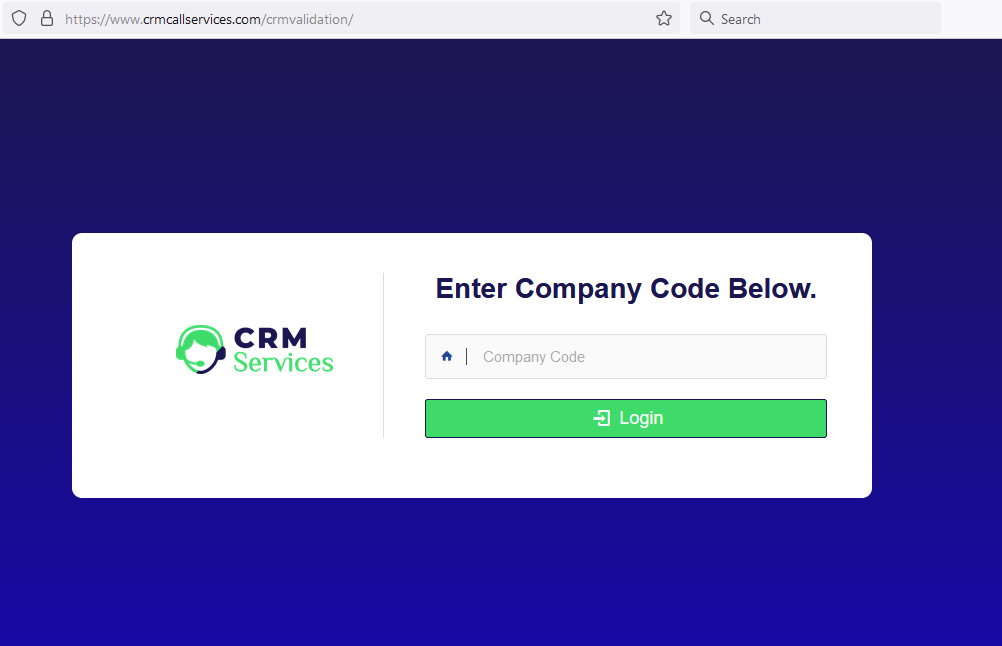
- Open this URL https://www.crmcallservices.com/crmvalidation/ to Enter Company Code which is sent in your email.
- After enter the Company Code the next screen will appear to Enter Email id and password.
- Click to Login button to enter dashboard.
Step 4 : Dashboard
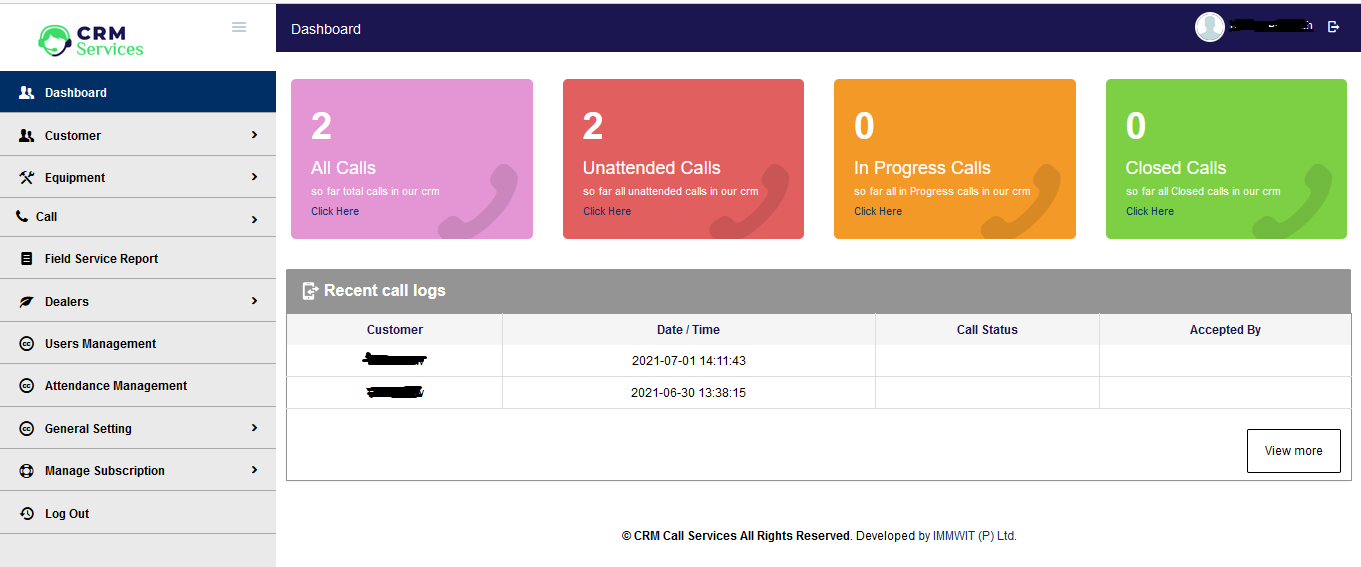
- You can see dashboard after successfully login.
- Left menu navigation which you can manage all the CRM functionality.
- There is summary of the calls/complain in the middle of the screen.
Step 5 : Manage Customer
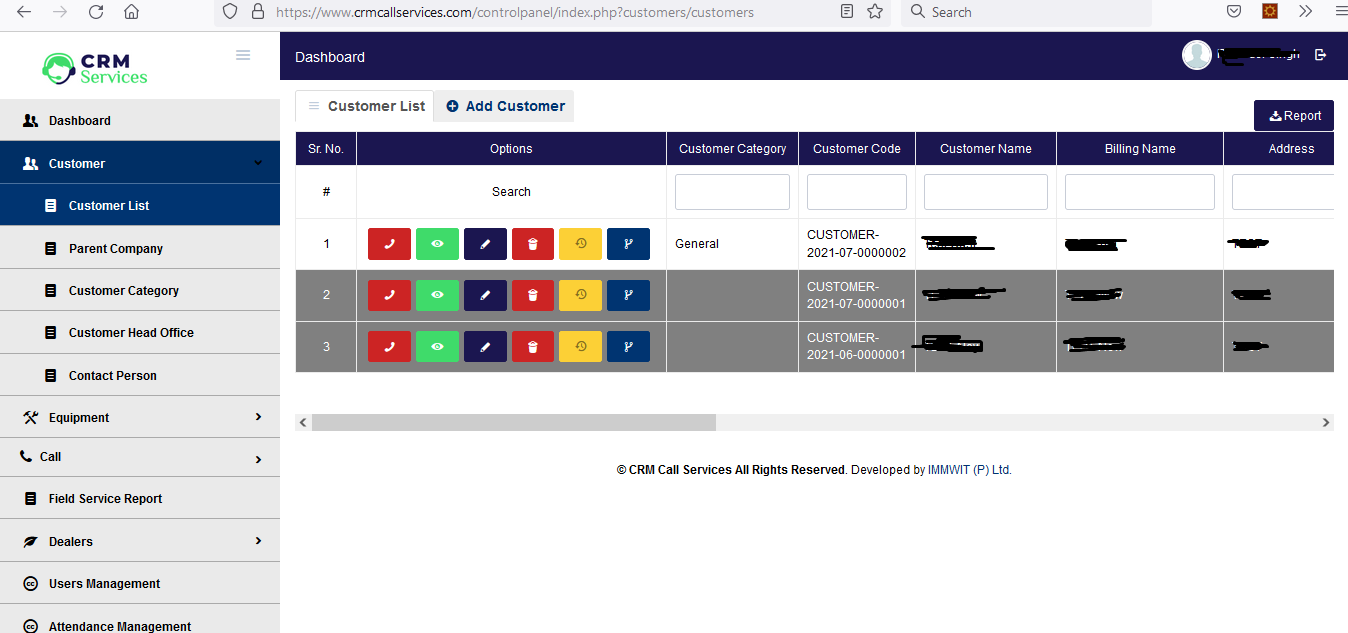
- Click to customer navigation to manage customer
- There is two tab in the middle of the screen Customer List and Add Customer
- In customer navigation , there is customer category and other data related to customer can manage
Step 6 : Manage Equipment
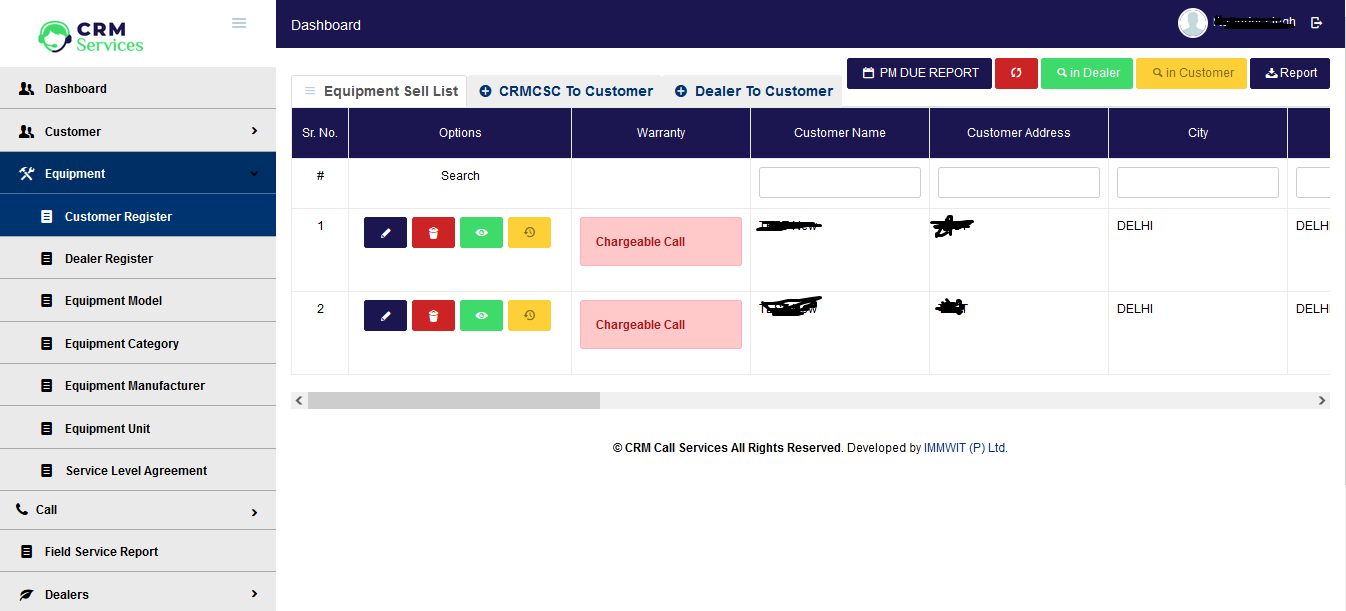
- Click to Equipment navigation to manage Equipment
- Admin User can manage Dealer, Equipment Category, Model, Brand from Equipment Navigation
Step 7 : Manage Call
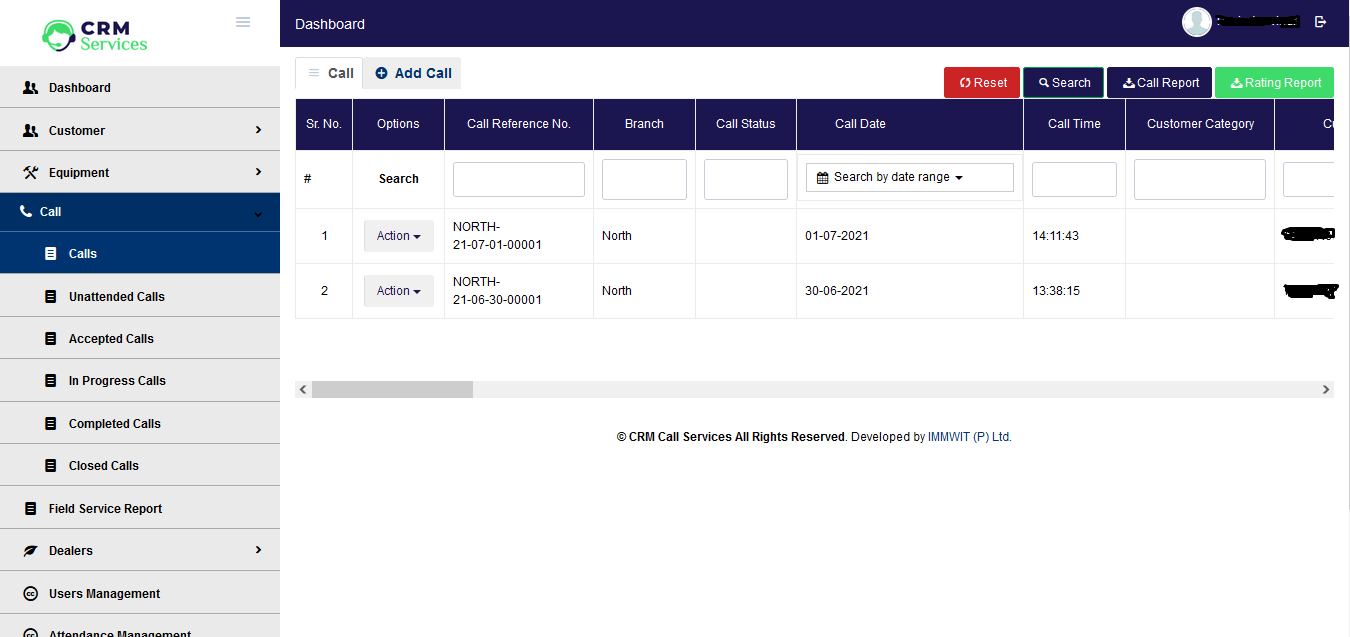
- Click to Call navigation to manage Call
- There is two tab in the middle of the screen Call and Add Call to create call of the customer
- Admin user can manage all status of call like Unattended calls, Accepted calls etc.
Step 8 : Manage Field Service Report
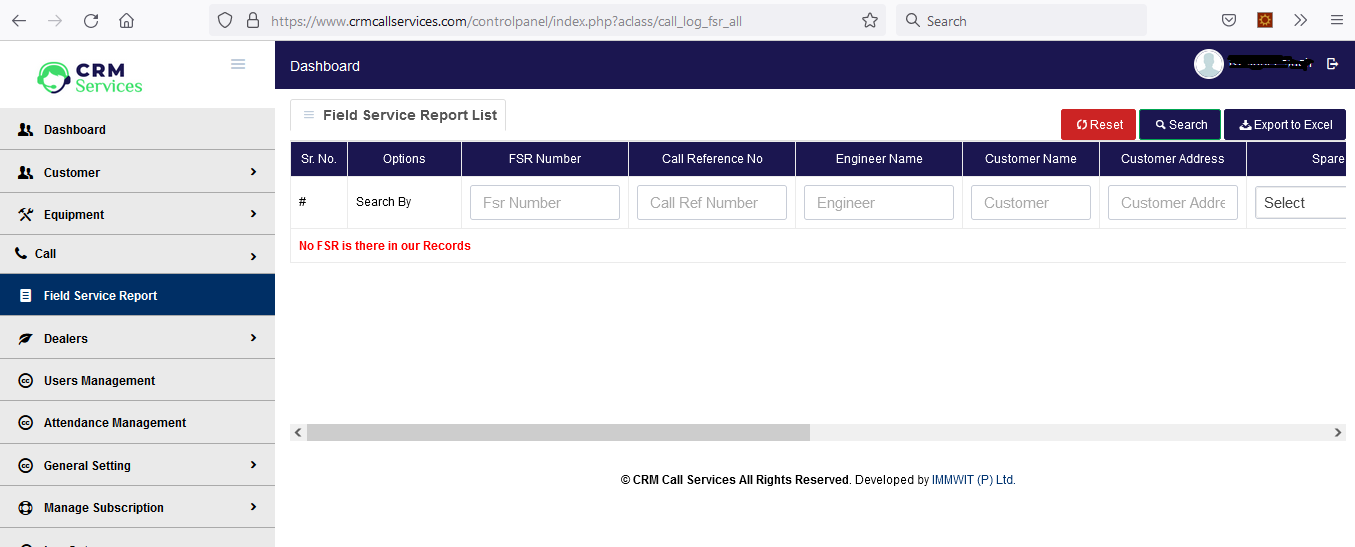
- Click to Field Service Report navigation
- All Field Service Report listing here to view/edit FSR.
Step 9 : Manage Dealer
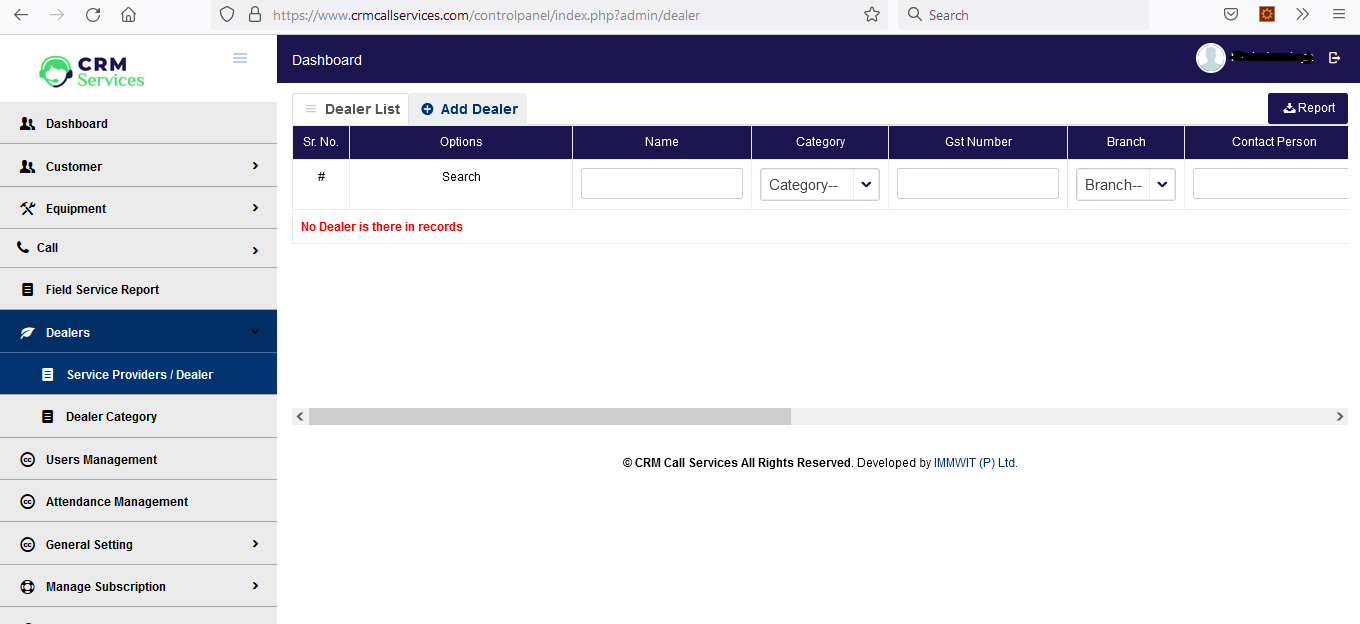
- Click to Dealer navigation to manage Dealer
- There is two tab in the middle of the screen Dealer List and Add Dealer to Dealer
- Admin user can also created Dealer Category in Dealer navigation
Step 10 : Manage Employee
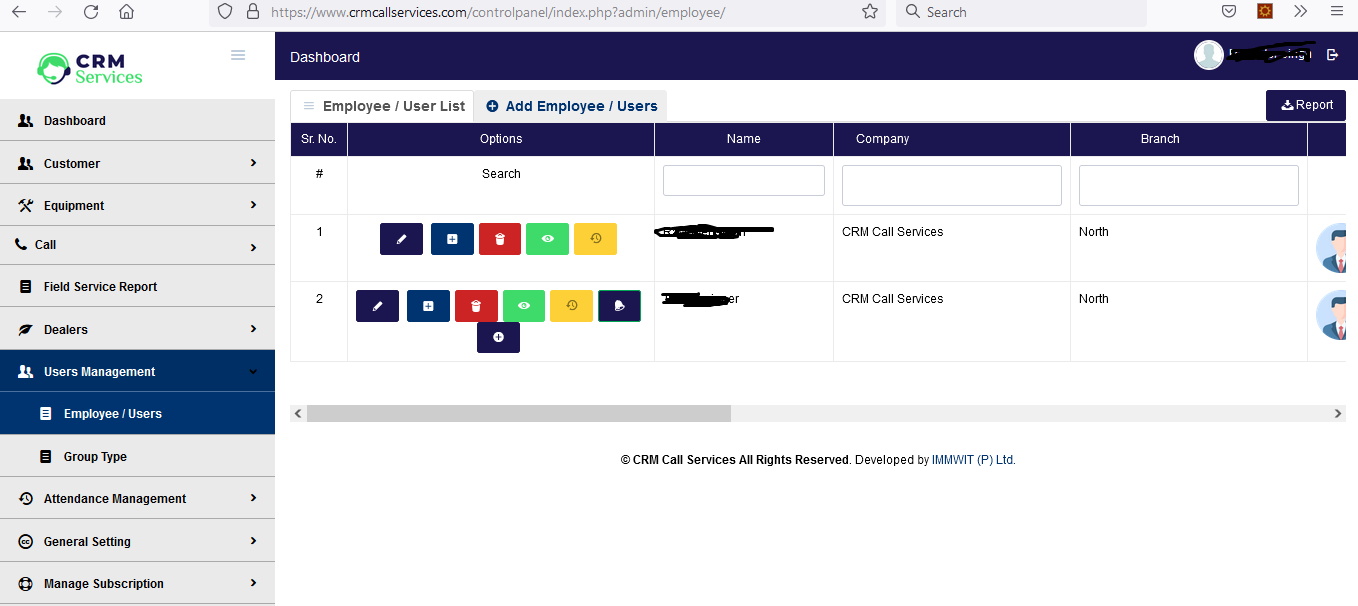
- Click to Employee navigation to manage Employee
- There is two tab in the middle of the screen Employee List and Add Employee to Add new employee
Step 11 : Manage Attendance and Leave
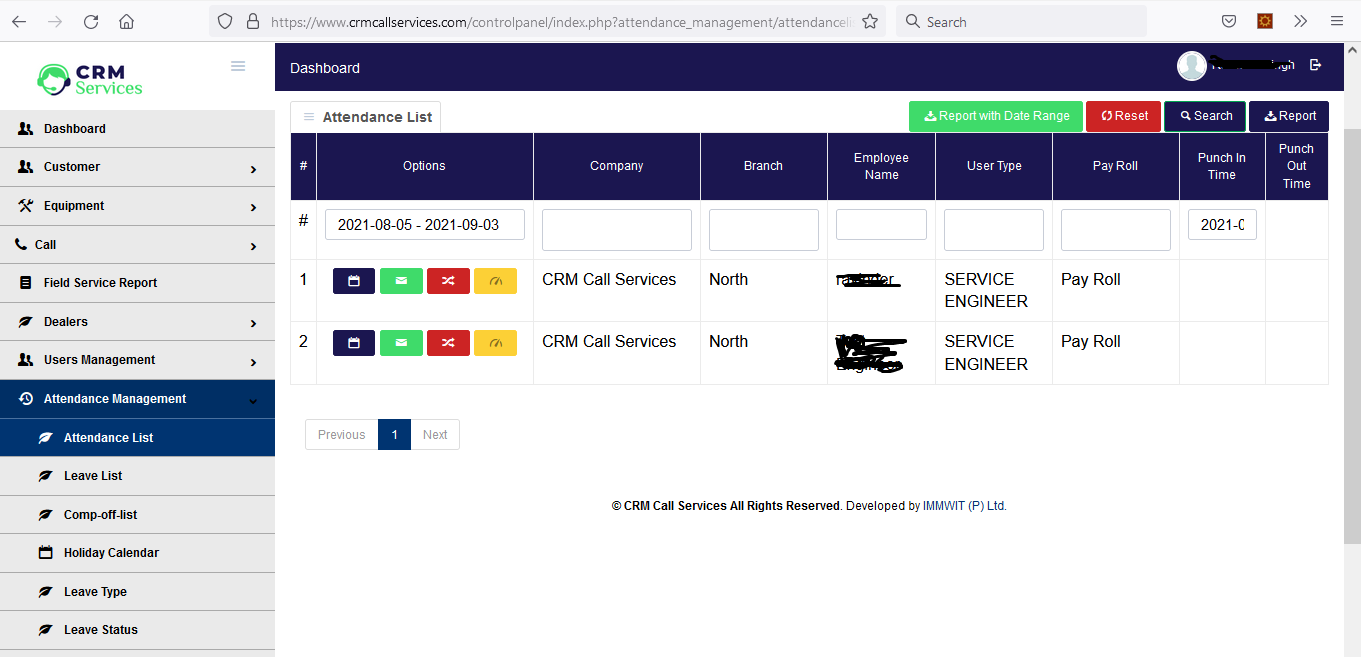
- Click to Attendance navigation to manage Attendance and HR functionality
- Admin user can also manage Leave list, Holiday calendar and and Leave status from Attendance navigation
Step 12 : General Setting
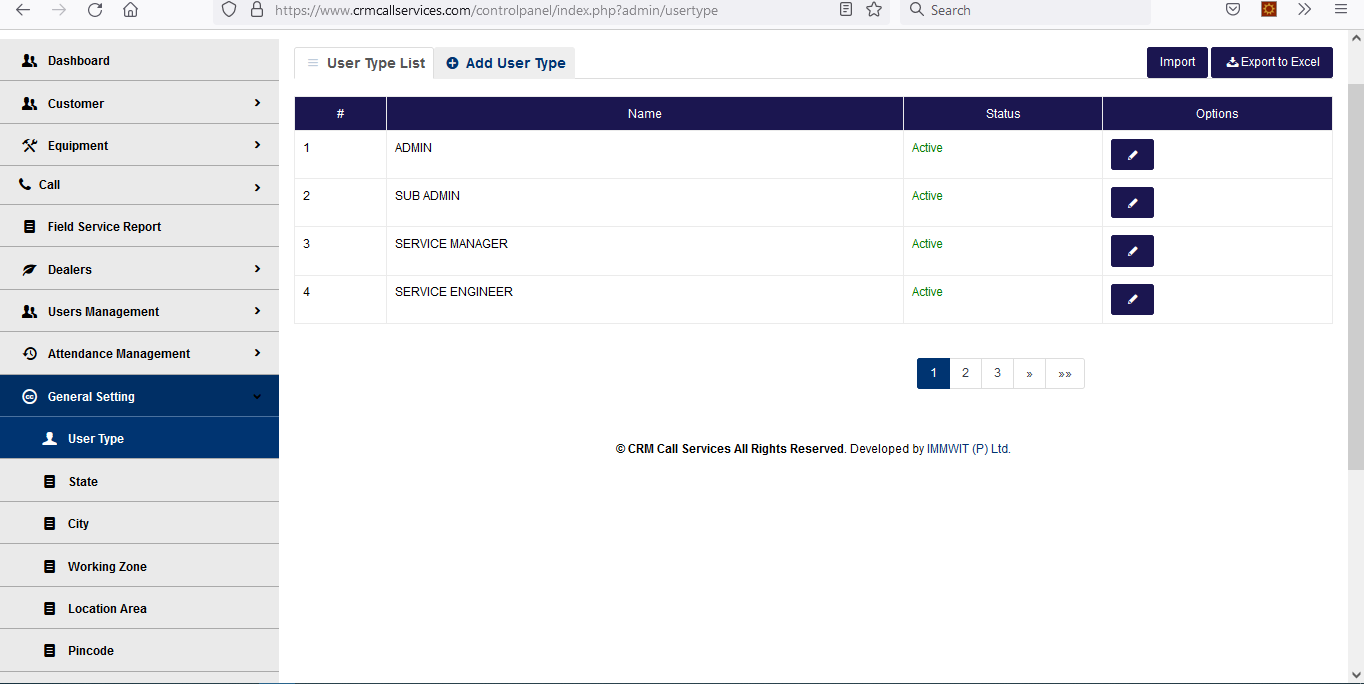
- Click to General Setting to manage General Setting
- Admin user can manage State, city, working area, system information etc from General setting navigation
Step 13 : Manage Subscription
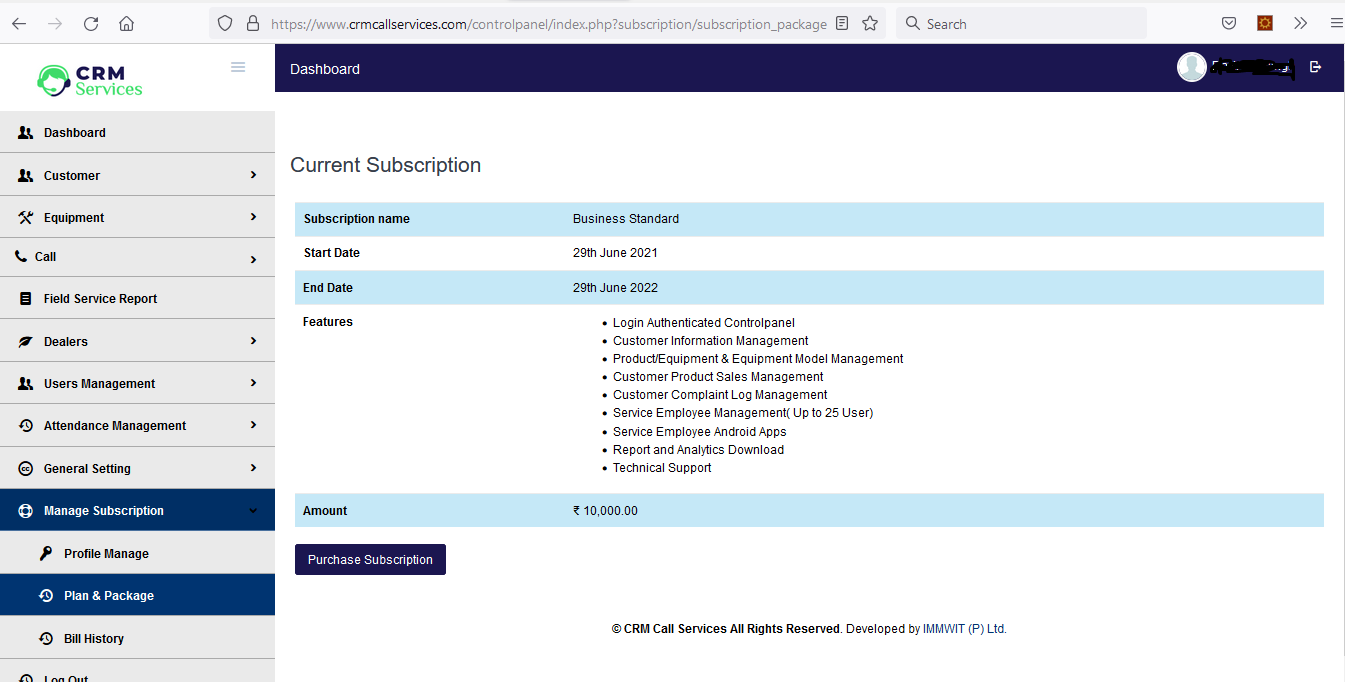
- Click to Manage Subscription to manage Manage Subscription
- Admin user can subscription plan and profile images
- Admin user can view the bill history
Contents
- 1 – Step
- 1.1 – Step 1 : CRM Free Trial Account
- 1.2 – Step 2 : Activate Account
- 1.3 – Step 3 : Login to your account.
- 1.4 – Step 4 : Dashboard
- 1.5 – Step 5 : Manage Customer
- 1.6 – Step 6 : Manage Equipment
- 1.7 – Step 7 : Manage Call
- 1.8 – Step 8 : Manage Field Service Report
- 1.9 – Step 9 : Manage Dealer
- 1.10 – Step 10 : Manage Employee
- 1.11 – Step 11 : Manage Attendance and Leave
- 1.12 – Step 12 : General Setting
- 1.13 – Step 13 : Manage Subscription
Contents
- 1 - Step
- 1.1 - Step 1 : CRM Free Trial Account
- 1.2 - Step 2 : Activate Account
- 1.3 - Step 3 : Login to your account.
- 1.4 - Step 4 : Dashboard
- 1.5 - Step 5 : Manage Customer
- 1.6 - Step 6 : Manage Equipment
- 1.7 - Step 7 : Manage Call
- 1.8 - Step 8 : Manage Field Service Report
- 1.9 - Step 9 : Manage Dealer
- 1.10 - Step 10 : Manage Employee
- 1.11 - Step 11 : Manage Attendance and Leave
- 1.12 - Step 12 : General Setting
- 1.13 - Step 13 : Manage Subscription